How-To's
To save Discussions, you must either copy-and-paste into Microsoft Word or another word processor, or print posts to a PDF file. When viewing discussions in Reading View, you can use your web browser’s print feature and skip to step 5, below. If you’re viewing discussions in Grid View, follow the steps below, beginning at step 1. More information on switching between Grid View and Reading View can be found here, or from your campus D2L support personnel.
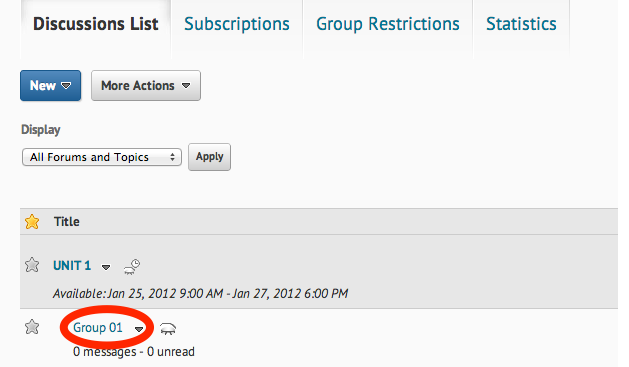
- In your course, select “Discussions” from the navigation bar. Select (click) the Topic you’d wish to archive posts from. An example is shown here.

- When viewing the topic posts, you can change the view options to allow you to ‘print’ all posts. Change view to “All Posts” under “Unthreaded”

- By default, the number of posts viewed at a time is 20. Increase the number of posts to as high as possible — typically 50.
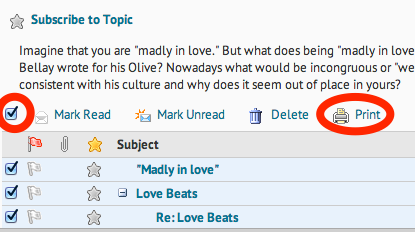
- At the top of the list of posts, to the left of the headings is a checkbox. Select it to select all messages on that page. The background of each message title, name, etc will turn blue. Then select the ‘Print” icon at the top of the page.

- A window will appear with the text from all posts.
- If Adobe Acrobat is installed, you can also select the “Print” button in the window to open the Print settings window for your computer. Select ‘Adobe PDF” for the printer.
- If you use other PDF software, you should be able to use that software to convert the posts to a PDF.
- If you have Microsoft Office XP or higher for Windows, you can also print the document to “Microsoft Office Document Image Writer”/”Microsoft XPS Document Writer” which will save all pages as a multi-page TIFF file or XPS file.
- You can also select (highlight) all text and copy-and-paste into Word or another word processor application.
- Contact your campuses support office or Helpdesk for available export options.
Also, remember that the exported file may contain sensitive information such as private student information. Always store the file on a university maintained, secure, password protected location.
